
Automate certificates with Azure App Gateway V2, Key Vault and Let's Encrypt
After many months of searching and testing for the perfect setup at work to get around the annoying (however understandable) 90 day certificate renewal with Let's Encrypt certificates, I have found a solution which will generate, renew, import into a Azure KeyVault and then be used and kept up to date by Azure Application Gateway V2.
In this post I presume you already have an Application Gateway V2 configured, if not then follow through this tutorial skipping part 1 and then creating an application gateway following the instructions here, you will need to change the creation of the KeyVault step to getting the created KeyVault.
I will not be covering that here, however all the PowerShell commands are available and well documented in the Azure Knowledgebase.
The first part of the post comes courtesy of Brent Robinson on Medium, i have reposted it below purely for ease.
Part 1
ACME on Azure with Azure DevOps
We’ll explore how we can use Azure and Azure DevOps together to automate the certificate issuance and configuration processes. We’ll use Posh-ACME as our PowerShell-based ACME client, Let’s Encrypt as our certificate authority, and we’ll complete DNS challenges to prove control of our domain.
There are some prerequisites you’ll need:
· An Azure subscription with permission to create new resources.
· An Azure DevOps project which you can create a code repository, build pipeline, and service connection.
· Permission in Azure Active Directory (AAD) to create an application, service principal, and credential.
· The Az PowerShell module installed on your computer.
· Basic knowledge of Azure, Azure DevOps, and PowerShell.
· Basic knowledge of DNS including CNAME and TXT records.
· Ideally, using Azure DNS to host the DNS zone for your website. At the end of this article, we look at how you can have your DNS zone outside of Azure, but in any case, you’ll need permission to add and remove DNS records in the zone.
This solution isn’t free; but should cost less than AUD$2 per month. If you’re new to Azure, the sign-up credit should cover all the resources we’ll be creating. Blob storage and key vault costs less than 10 cents per month. DNS varies depending on the traffic to your website, but for over a million DNS queries per month, you’ll spend less than AUD$1.50. Automated certificate management for AUD$2 per month — an excellent investment.
Solution overview
Our objective is to use an Azure DevOps pipeline to automate the issuance and renewal of certificates and upload those certificates (and private keys) to Azure Key Vault. Once we have the certificate and key in Azure Key Vault, we can configure them on the application servers.
 Figure 1: The build pipeline and ACME process for acquiring a certificate
Posh-ACME is designed to orchestrate the issuance with an ACME compatible certificate authority (in our case, Let’s Encrypt). Our build pipeline wraps the Posh-ACME capabilities with holistic management of the stateful data. Subsequent processes can utilise the certificate/keys once they’re imported into Key Vault.
Azure Resources
Let’s begin.
We’ll need a few resources in Azure to support this process and will create them using Az PowerShell. You could also use the Azure CLI
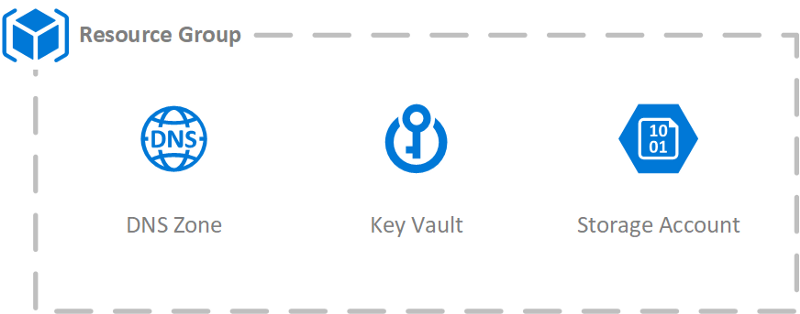 Figure 2: The Azure resources required
Start with a resource group if you’re not reusing an existing one.
New-AzResourceGroup -Name "acme" -Location "australiaeast"
DNS Zone: This is where we’ll publish our DNS challenges. You’ll need to configure your domain registrar to use the DNS zone you’ve created in Azure. If you’re not managing your websites DNS with Azure, there are a few alternatives — check the end of this article for more details. Change the Name parameter to your domain name.
New-AzDnsZone -Name "brentrobinson.info" -ResourceGroupName "acme"
Blob Storage: Posh-ACME is stateful. Posh-ACME stores ACME server information, certificate order details, certificates, and private keys on the file system. We’ll persist all this data to Blob storage. We enable HTTPS Traffic Only as this storage account contains sensitive private keys which should not be transferred without encryption. Change the SKU to meet your redundancy requirements. Change the storage account Name parameter to be globally unique.
New-AzStorageAccount -Name "acmecerts" -ResourceGroupName "acme" -Location "australiaeast" -Kind StorageV2 -SkuName Standard_LRS -EnableHttpsTrafficOnly $true
$storageAccountKey = Get-AzStorageAccountKey -Name "acmecerts" -ResourceGroupName "acme" | Select-Object -First 1 -ExpandProperty Value
$storageContext = New-AzStorageContext -StorageAccountName "acmecerts" -StorageAccountKey $storageAccountKey
New-AzStorageContainer -Name "poshacme" -Context $storageContext
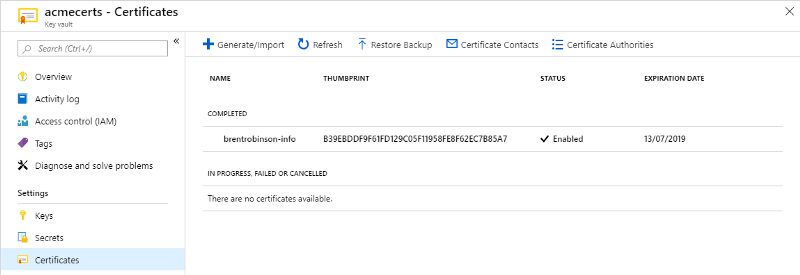
Key Vault: We’ll use Key Vault to store the issued certificates and their private keys. You could alternatively access this information from the Posh-ACME state in blob storage. On the key vault, we enable purge protection and soft delete to provide additional protection against accidental loss. Change the key vault Name parameter to be globally unique.
Note: if you are following along as a learning exercise only, don’t enable soft delete or purge protection — skipping these features simplifies resource clean up.
New-AzKeyVault -Name "acmecerts" -ResourceGroupName "acme" -Location "australiaeast" -EnablePurgeProtection -EnableSoftDelete
Azure DevOps
We’ll use Azure DevOps to orchestrate the certificate issuance process. The build pipeline is scheduled to execute at regular intervals to renew the certificate if required. The build pipeline uses a service connection to control Azure resources. We’ll define the build pipeline in YAML format, and store it inside an Azure Repos Git repository.
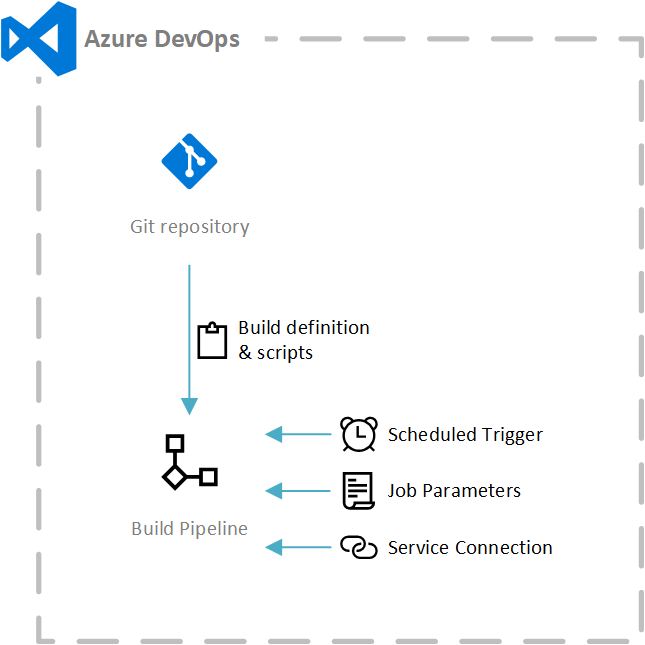 Figure 3: The inputs to the Azure DevOps build pipeline
Create the service principal
We’ll create an Azure service principal with just enough permissions to our Azure resources. Again, we’ll use Az PowerShell.
$application = New-AzADApplication -DisplayName "ACME Certificate Automation" -IdentifierUris "http://brentrobinson.info/acme"
$servicePrincipal = New-AzADServicePrincipal -ApplicationId $application.ApplicationId
$servicePrincipalCredential = New-AzADServicePrincipalCredential -ServicePrincipalObject $servicePrincipal -EndDate (Get-Date).AddYears(5)
The IdentifierUris parameter is irrelevant and unused in our scenario, but it is a required parameter, so ensure it’s something unique within your Azure Active Directory tenant.
Once created, we can view the service principal client id and password secret with these commands.
Write-Output ("Client ID = {0}" -f $servicePrincipal.ApplicationId)
Write-Output ("Client Secret = {0}" -f [System.Net.NetworkCredential]::new([string]::Empty, $servicePrincipalCredential.Secret).Password)
Record both these values as we’ll use them shortly.
Grant the service principal access to the resources
The service principal needs access to the resources created in Azure.
We’ll grant DNS Zone Contributor on the DNS Zone to enable Posh-ACME to create the DNS challenge TXT records for domain validation.
New-AzRoleAssignment -ObjectId $servicePrincipal.Id -ResourceGroupName "acme" -ResourceName "brentrobinson.info" -ResourceType "Microsoft.Network/dnszones" -RoleDefinitionName "DNS Zone Contributor"
We’ll grant the service principal access to read the key vault, on the control plane. We’ll also grant access to the data plane. Get Certificate allows us to check if we’ve been issued a newer certificate by examining the thumbprint of the certificate in Key Vault. Import Certificate allows us to import issues certificates into the Key Vault.
New-AzRoleAssignment -ObjectId $servicePrincipal.Id -ResourceGroupName "acme" -ResourceName "acmecerts" -ResourceType "Microsoft.KeyVault/vaults" -RoleDefinitionName "Reader"
Set-AzKeyVaultAccessPolicy -ResourceGroupName "acme" -VaultName "acmecerts" -ObjectId $servicePrincipal.Id -PermissionsToCertificates Get, Import
We’ll generate a SAS token to access the data in the Azure Storage container.
$storageAccountKey = Get-AzStorageAccountKey -Name "acmecerts" -ResourceGroupName "acme" | Select-Object -First 1 -ExpandProperty Value
$storageContext = New-AzStorageContext -StorageAccountName "acmecerts" -StorageAccountKey $storageAccountKey
New-AzStorageContainerSASToken -Name "poshacme" -Permission rwdl -Context $storageContext -FullUri -ExpiryTime (Get-Date).AddYears(5)
Record the SAS token URI as we’ll use it as we configure the build pipeline shortly.
We’ll also need to know the resource ID of the key vault, so let’s retrieve it now.
Get-AzKeyVault -ResourceGroupName "acme" -VaultName "acmecerts" | Select-Object -ExpandProperty ResourceId
Record the key vault resource ID.
Create a service connection
Now, we’ll connect Azure DevOps to Azure using the service principal we’ve created.
In your Azure DevOps project, navigate to Project Settings, and select Service connections. From the New service connection menu select Azure Resource Manager.
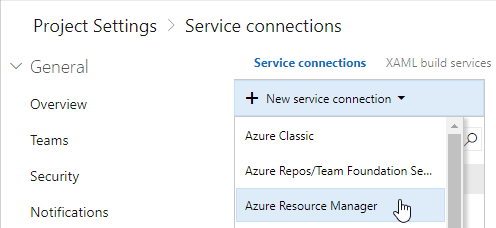
Wait a moment until the Subscription field is loaded, select the correct subscription, then click use the full version of the service connection dialog.
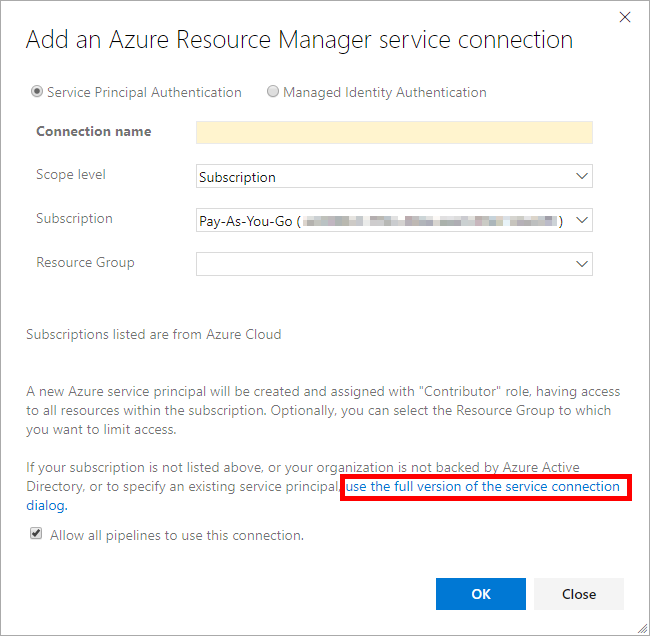
Enter the service principal client ID and service principal key into the dialog. The principal key is the password credential we generated when creating the service principal. Click Verify connection to validate the details are correct. For security best practice, untick Allow all pipelines to use this connection. We’ll authorise only the pipeline that needs this connection, which prevents other pipelines from inadvertently gaining access to our certificate and private key data.
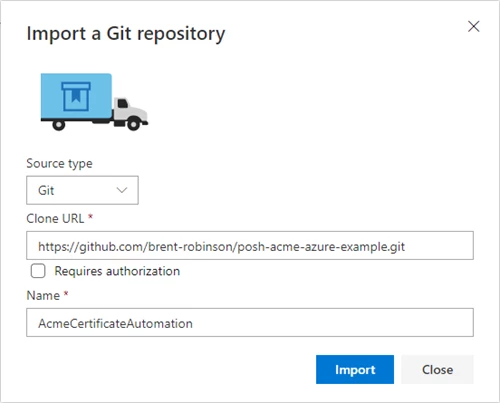
Clone the repository with the pipeline definition
We’ll initialise our Azure Repos git repository by cloning an existing repository. While it is possible to reference the existing repository directly from your build pipeline, it’s best practice to clone it. Cloning the repository ensures you maintain full control of changes of the scripts; remember these scripts execute on your build agents with your credentials.
In your Azure DevOps project, open Repos and select Import Repository.
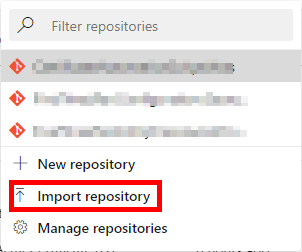
Enter the Clone URL: https://github.com/brent-robinson/posh-acme-azure-example.git
Choose a name for your new repository.
Take a moment to explore the repository. You’ll see a .yml file representing our build pipeline definition, and a couple of PowerShell scripts.
Create the build pipeline
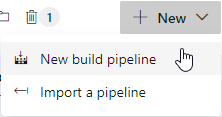
In your Azure DevOps project, open Pipeline, then Builds.
Select New, then New Build Pipeline.
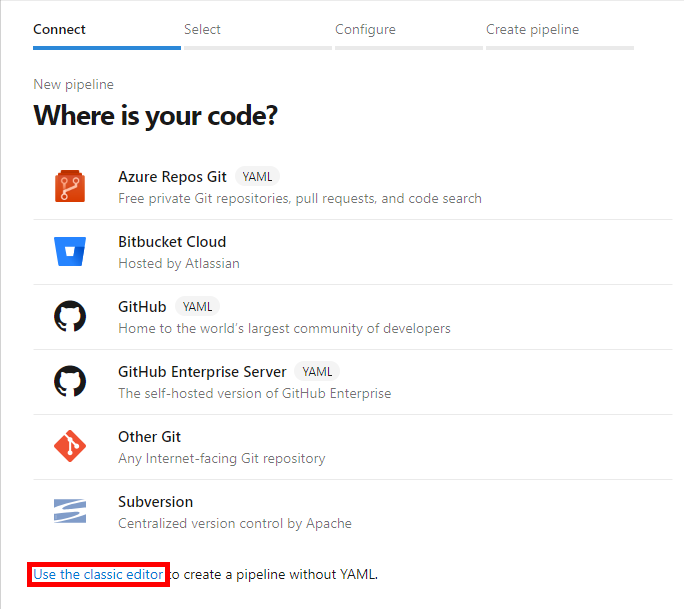
 Select Use the classic editor at the bottom of the list.
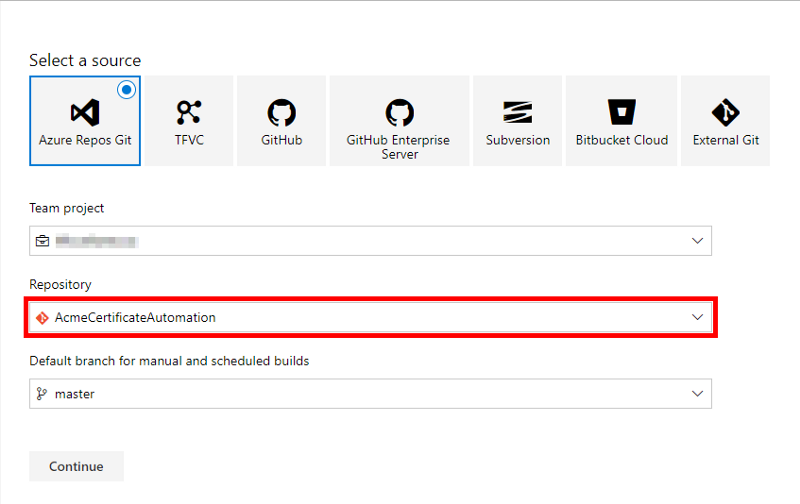
Select the repository you created and click Continue.
Select the YAML template.

Name your pipeline. Select the Hosted Ubuntu 1604 agent pool and enter a YAML file path of azure-pipelines.yml.

Next, we need to configure the pipeline variables. Switch to the Variables tab of the pipeline and add the following variables:
· AcmeContact: The email address which should be notified by Let’s Encrypt before a certificate is to expire.
· AcmeDirectory: The URL of the Acme Directory. Posh-ACME supports a shorthand format for Let’s Encrypt. Use “LE_STAGE” for Let’s Encrypt staging and “LE_PROD” for Let’s Encrypt production. It’s best to start with staging and switch to production when ready. Production has strict API limits.
· CertificateNames: A comma-separated list of domain names to include on the certificate. The first is the certificate subject. The Subject Alternate Name attribute on the certificate consists of any additional names.
· KeyVaultResourceId: The resource ID of the key vault in which to upload the certificates and private keys, which we retrieved this earlier.
· StorageContainerSASToken: The SAS token for the storage container you generated earlier. As this is sensitive, mark it as a secret (which obscures it on the screen, and in logs).

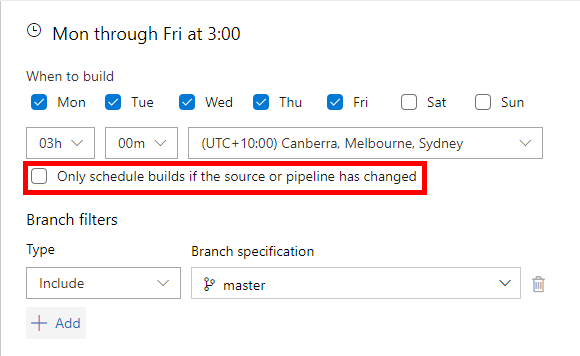
Finally, we want this pipeline to automatically run every day, and renew the certificate if it’s ready. Switch to the Triggers tab and add a daily schedule. Ensure you disable the option Only schedule builds if the source or pipeline has changed as we want it always to run. You could run this pipeline less frequently, such as once a week. Ensure you allow it to run often enough to renew the certificate before it expires. By default, Posh-ACME will only renew the certificate once it’s due to expire within 30 days. Technically, you could run it once a month, but you run the risk of a failure leaving your certificate to expire. It’s safest to run too frequently as Posh-ACME will skip renewing a certificate which isn’t ready.
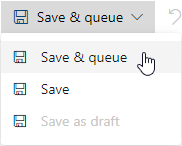
Save & queue the pipeline. By manually queuing the pipeline, we’ve authorised the Service Connection on this pipeline. The pipeline can now use the Service Connection when called from the scheduled trigger.
The job should take approximately 5 minutes to run. When complete, the certificate will be in your Key Vault.
When the certificate is due to expire within 30 days, the pipeline job will automatically renew the certificate and upload the new certificate into your Key Vault.
The certificate
If you’ve started by using the Let’s Encrypt staging environment, the certificate issued won’t be trusted. When you’ve proved the process, switch to the Let’s Encrypt production environment which issues trusted certificates. You can do this by updating the AcmeDirectory parameter in your pipeline and re-running the pipeline.
Wildcard certificates
If you would like to issue Wildcard Certificates via this method, then in the CertificateNames variable simply enter your domain as below:
*.domain.tld,domain.tld
This will issue a certificate which will work with all subdomains as well as the top level domain.
Part 2
This next part is fairly easy, it can be done via PowerShell on your local PC, however I found it quicker to use the Azure Portal Cloud Shell.
The PowerShell commands you need to run to import the certificate into the Application Gateway V2 from the KeyVault are:
$AppGW = Get-AzApplicationGateway -Name "APPGATEWAYNAME" -ResourceGroupName "RESOURCEGROUP"
$secret = Get-AzKeyVaultSecret -VaultName "VAULTNAME" -Name "CERTNAME"
$secretId = $secret.Id.Replace($secret.Version, "")
Note: As version-less secretId is provided here, Application Gateway will sync the certificate in regular intervals with the KeyVault.
$AppGW = Add-AzApplicationGatewaySslCertificate -ApplicationGateway $AppGW -Name "CERTNAME" -KeyVaultSecretId $secretId
$UpdatedAppGw = Set-AzApplicationGateway -ApplicationGateway $AppGw
So in conclusion we have the Dev Ops Pipeline generating the certificate, and handling the renewal which is being checked on a daily basis, and then because we have remove the secret version the application will check the KeyVault for a new certificate regularly.
Using this method the Application Gateway V2 will always be using the most recent certificate available in the vault.
You can also use the certificate with the Azure API Management service, Web App or any other service which can access the KeyVault.